Have you ever felt a bit stuck when trying to add a document in Google Docs, unsure of the right way to go about it?
Don’t worry! We’ve simplified the process in this guide, offering you easy steps to insert documents into your Google Docs.
We’ve helped countless users navigate the Google Docs landscape, and our updated method has made the process very easy for beginners and seasoned users alike.
In this guide, you’ll learn:
How to insert a document in Google Docs
Here’s a detailed step-by-step guide on how to insert a document in Google Docs:
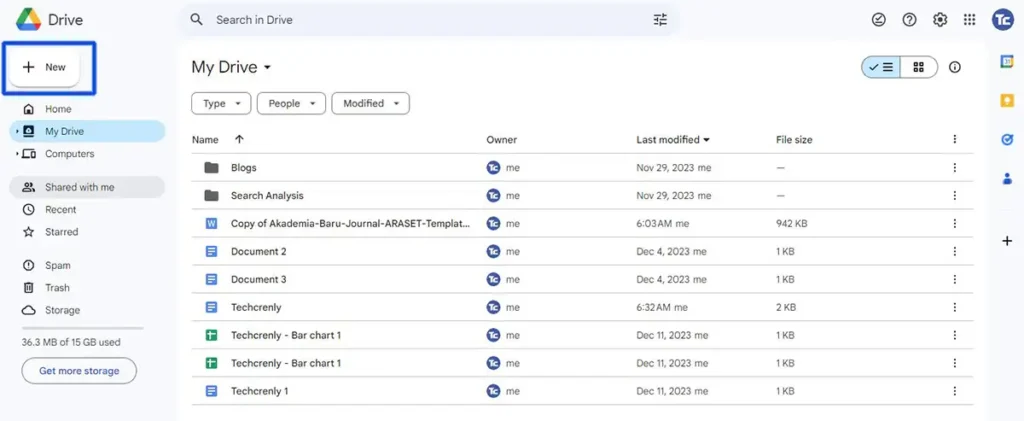
1. Open your Google Drive. Click on the + New button on the left-hand side.
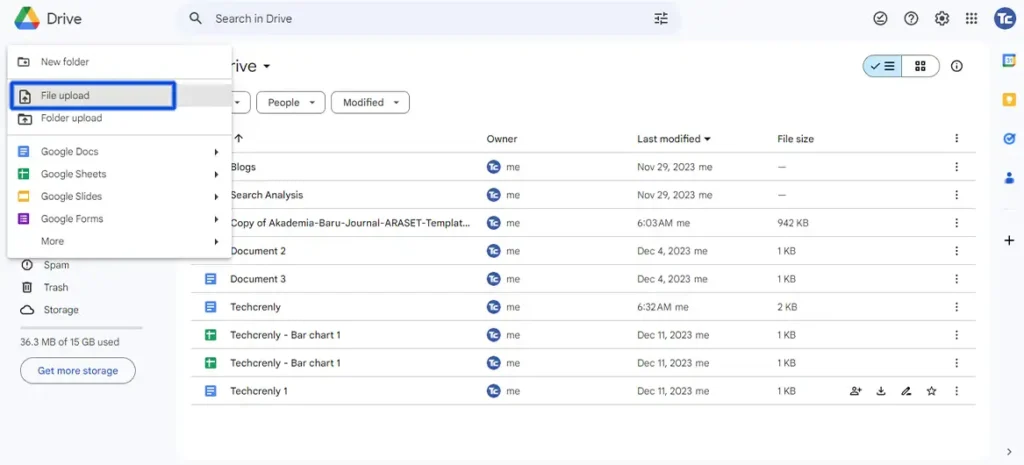
2. Select File upload. Choose the document you want to insert and upload it to your Google Drive.
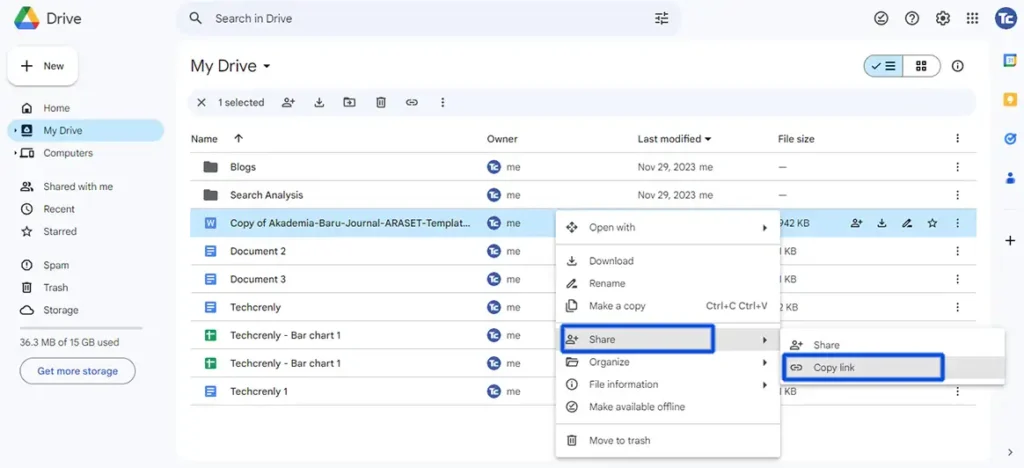
3. Locate the uploaded document in your Google Drive then right-click on the document, and a menu will appear. Choose Share in the menu to access sharing options then click Copy link to obtain the shareable link for your document.
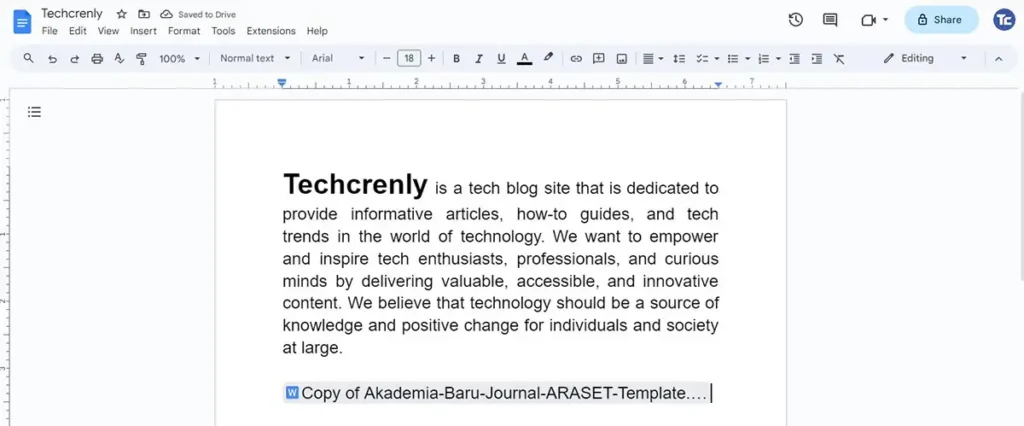
4. Open Google Docs in your web browser. In your Google Docs document, place the cursor where you want to insert the link. Press Ctrl + V (Windows) or Command + V (Mac) to paste the link.
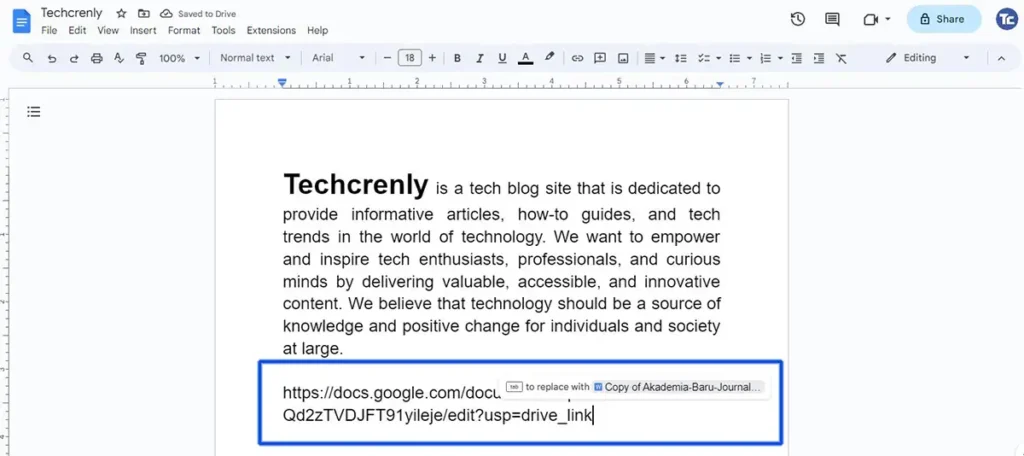
5. After pasting the link, press the Tab key on your keyboard. The link will transform into a formal file format, displaying the document title. Adjust formatting as needed. Your document is now inserted into your Google Docs file.
Final thoughts
I know that inserting a document in Google Docs might seem a bit confusing, but with our 5 simple steps, you’ve got a valuable skill that will improve the way you create documents.
Now, you don’t have to worry about feeling overwhelmed when adding a document. Using our steps, Google Docs is now more flexible, letting you easily add outside files to your documents.

