Do your Chrome tabs resemble a crowded party where finding the right one feels like searching for a needle in a haystack? You’re not alone!
The fix? Group your tabs. This is a Chrome feature that can turn your tab chaos into an organized digital workspace, and it’s surprisingly easy.
I’ve been through a tab overload struggle. Once I discovered tab grouping, it was a game-changer.
In this guide, you’ll learn:
How to group tabs in Google Chrome
Here’s a step-by-step guide on how to group tabs in Google Chrome:
1. Launch Chrome on a Windows computer.
2. Open the tabs that you want to group. You can do this by opening new tabs for different websites or using existing ones.

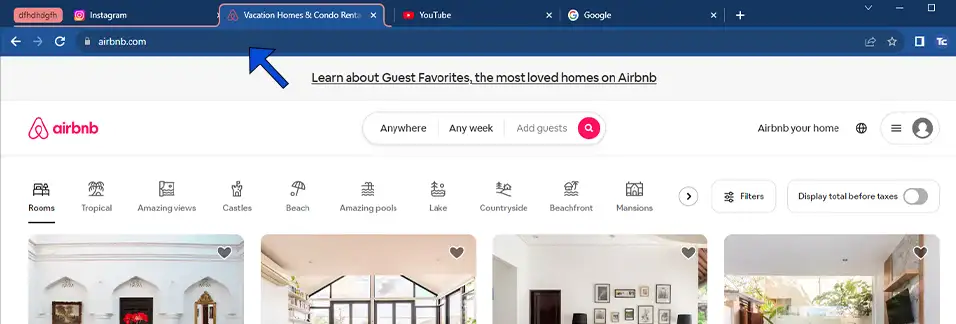
3. Locate any tab you want to include in a group, right-click on it, and you’ll see a menu, then select Add tab to new group.

4. Name your group and choose a group color.

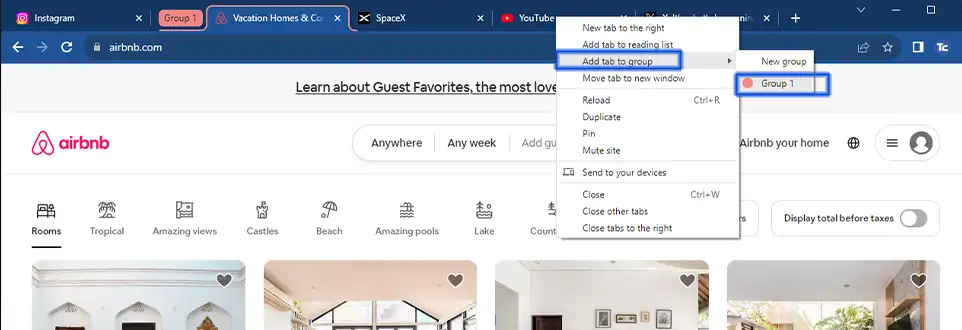
5. To include more tabs in a group, right-click on the desired tab, select “Add tab to group,” and then choose the specific group for that tab. Repeat this process for each tab you want to add to the group.

6. You can also drag and drop them onto the tab with the desired group name. Simply click, hold, and move the tab over the target group until it’s highlighted, then release the mouse button.

7. If you want to change the order of tabs within a group, simply drag and drop them to rearrange.
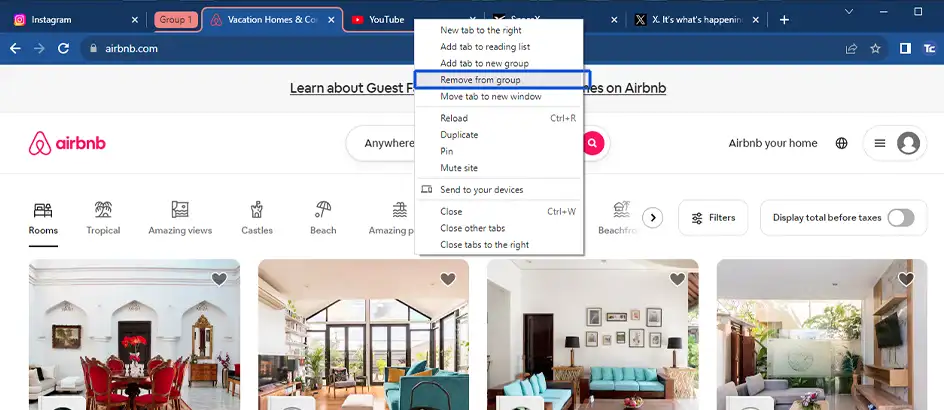
8. If you decide to ungroup a tab, right-click on a tab within the group, then select remove from group.

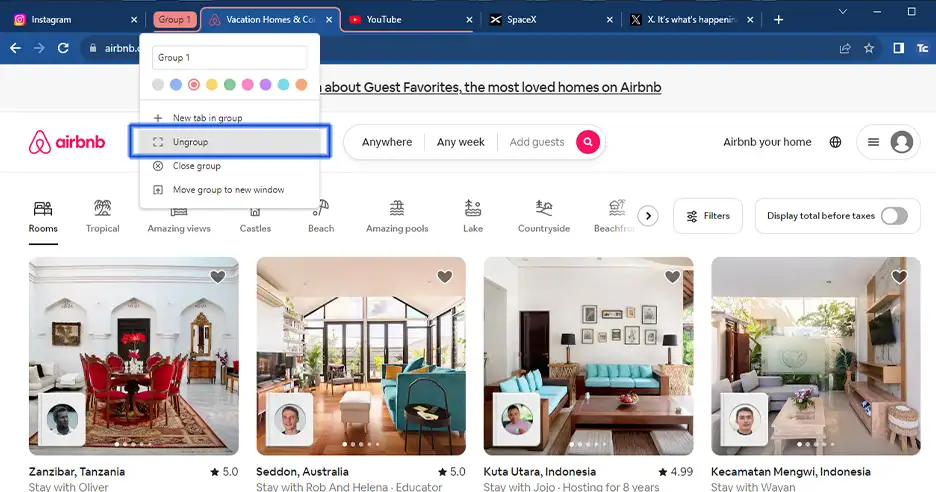
9. To remove the group, right-click on the group name and select Ungroup.

Final thoughts
Applying the habit of grouping tabs in Google Chrome is like giving your browser a well-deserved makeover.
It might seem like a small change, but the impact is significant. Imagine no longer getting lost in a sea of open tabs, frantically searching for the right one.
This is a practical solution to the common frustration of dealing with too many tabs at once.


